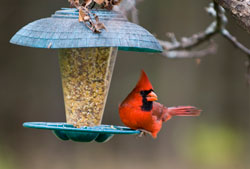
Plants with berries add winter interest to the garden and also attract many different types of birds. But which berries are best for your yard, and how can you ensure a bountiful buffet for your feathered friends to enjoy?
Caring for Berries
No matter which berries you choose to add to your landscape, opt for varieties native to your region. When berries are native, they are more readily adapted to the local climate changes, including the temperature extremes of winter. Furthermore, regional birds will recognize the berries more easily and will enjoy them as a safe and familiar food source.
Plant berry bushes as early as possible so the plants have plenty of time to become established in your landscape and bear copious amounts of fruit for the winter. Water them well throughout the summer and fall to encourage a good crop of plump, rich berries. Avoid pruning the bushes in autumn, and instead leave the branches intact, complete with their tasty treats. Not only will winter wildlife enjoy the feast, but the extra shelter from unpruned bushes will also be appreciated.
Best Winter Berries
There are many different types of berries that can attract winter birds, but two standouts are top picks for winter interest, not only for the birds but for their beauty in the garden.
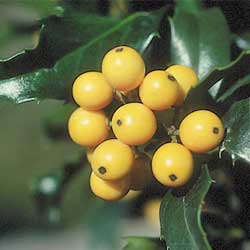
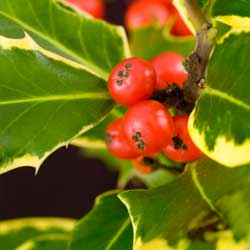
- Hollies
Offering long-lasting bird forage, this group of plants provides great cover and nesting sites as well as edible berries in shades of red, orange and yellow. And, because the berries ripen at different rates even on the same bush, hollies provide food for several months. Winterberry and American holly are easily pruned as shrubs or small trees and are almost always within pollinating range because they are natives. Birds that seek holly berries include robins, blue jays, eastern bluebirds, red-bellied woodpeckers and more, including grouse and quail. The sharp-edged foliage is also a deterrent to predators, and cut branches can be stunning holiday decorations if desired.
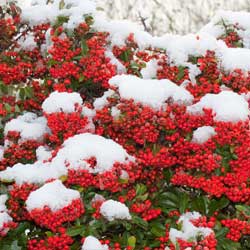
- Pyracantha
This easy to grow plant has a huge feathered following. In addition to different thrushes, bluebirds, woodpeckers, grouse and quail, pyracantha, or firethorn, also attracts cardinals and purple finches. The dense clusters of orange, yellow and red berries look like a blaze of fire in the winter landscape, and the thorny branches provide superior protection from predators as well as shelter from winter storms.
Winter birds will love the berries they can find in your yard, and you will love the visual interest and seasonal color these beneficial plants provide.