Author Archives: Rachel Patterson

Minor Bulbs: Perfect Partners for Early Spring Color

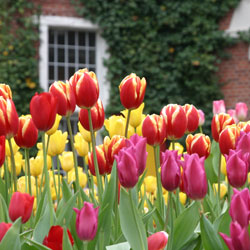
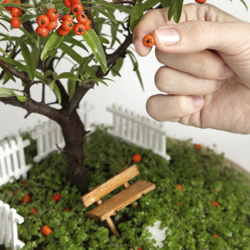
A garden stroll in the early spring offers a great deal of promise but generally little color. You can rectify this with a little planning and planting this fall to ensure bright spring blooms to enjoy.

What Is a “Minor” Bulb?

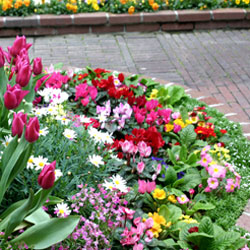
Often passed over at the garden center for showy, larger-flowering bulbs, minor spring bulbs give the garden a head start on spring, extending the season by blooming as early as February and March. These beautifully blossomed seasonal gems are short in stature and produce daintier flowers but, when planted en masse, make as powerful a statement as any daffodil, tulip or hyacinth planting.

Chionodoxa, Muscari, Eranthis, Galanthus and other minor bulbs are planted at the same time as tulips, daffodils and hyacinths, and in the same way, although not so deeply. The general rule of thumb is to plant bulbs three times as deep as the bulb is high. Your soil should be well drained so the bulbs do not rot. Don’t forget to include bone meal in the planting hole for strong growth in the spring.

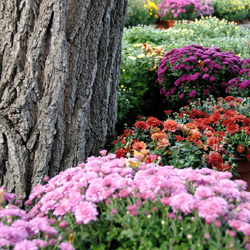
Minor bulbs make perfect partners for all of your other traditional spring-flowering bulbs. Their size makes them suitable for rock gardens and walkways, as well as filling in spaces between other spring bloomers. They also naturalize well and will help fill in any gaps in a spring garden or wildflower lawn.

Top Minor Bulbs

There are many lovely bulbs with smaller, stunning spring flowers to choose from. Some of the most popular and versatile options include…

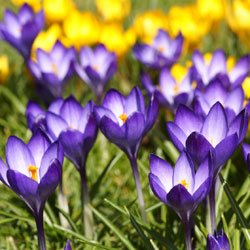
  • Chionodoxa (Glory of the Snow): Small, 1 inch white-centered blue or pink flowers appear on leafless stems. Plant in large groups in front of early blooming shrubs or naturalize in the lawn. When grown in shade, blooms last several weeks. Plants grow 4-10 inches tall.
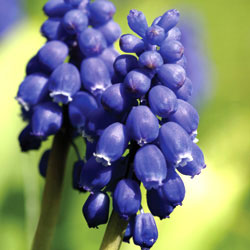
  • Muscari (Grape Hyacinths): Offering the rare and cherished blue color in the garden, Muscari have small spherical blossoms bunched into triangular clusters on top of delicate 6-9 inch stems. Grape hyacinths are available in various shades of blue, purple and white.
  • Eranthis (Winter Aconite): A relative to the buttercup, Eranthis unfolds bright yellow, honey-scented blossoms that can carpet the chilly ground and bring life to a dormant rock garden. Plants grow 2-4 inches tall.
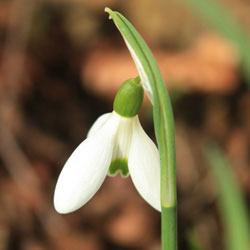
  • Galanthus (Snowdrops): The cold is no deterrent to the bell-shaped frosty white flowers of Galanthus. This plant thrives in light shade under leafless trees and is well suited to random planting amidst tough grass. Shorter varieties grow to 4 inches while giant snowdrops reach 10 inches.
  • Leucojum (Giant Snowflake): Drooping bells of white or pink flowers with green tips adorn this frost-hardy 4 inch plant.
  • Pushkinia (Striped Squill): The white flowers of this plant look light blue because of the blue stripes on the petals. Plant in sun or partial shade in well-drained soil. Striped Squill grows 6-8 inches tall.
  • Scilla (Spanish Squill): This late spring-flowering plant has multiple stems with up to 12 bells on each stem. Colors are blue, pink and white. Scilla needs adequate moisture in the flowering season as it grows to 10-12″ in height. Plant in full sun or partial shade.
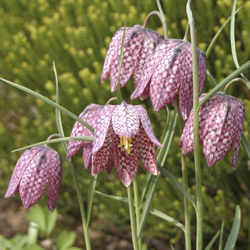
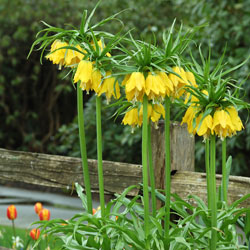
  • Frittilaria meleagris (Checkered Lily): This small Frittilaria grows to only 9 inches tall compared to its sibling Frittilaria imperalis (Crown Imperial) that grows to a height of 3 feet. The checkered lily’s name is derived from its checker-patterned petals.

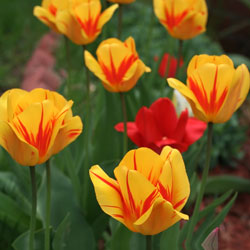
Any of these smaller, less obtrusive bulbs can make a great early spring statement in your garden or landscape, bringing it to life long before most spring blooms are at their peak.

snowdrop_250x250

checkeredlily_250x250_3

hyacinth_250x250

Healthy Soil: Winter Cover Crops

It’s fall and our annual and vegetable gardens are winding down for the season. Now is the time to invest a little extra time and effort to prepare your soil for next year. Whether your garden is large or small, all annual planting beds will benefit from the addition of a winter cover crop.

Benefits of Cover Crops

A cover crop is a fast-growing, low-maintenance crop that can be used to protect your garden and landscaping beds in fall and winter. Depending on the crop you choose, it can provide many benefits to your garden, including…

  • Stabilizing soil and preventing erosion
  • Adding organic matter back into the soil to nurture later crops
  • Adding nutrients to the soil that have been used by previous crops
  • Suppressing disease that can wither new crops even before they start
  • Repressing weeds that will take over a garden
  • Improving soil structure with aeration and better drainage
  • Encouraging beneficial insects that will help later crops

Recommended Cover Crops

Different cover crops work best in different areas, and the climate, soil type and growing season will help determine which cover crops will work best for your gardening needs. The most popular recommended cover crops for our area are oats, rye and wheat.

  • Oats
    Sow 6-8 weeks before the first hard frost. Planted early, oats will provide a quick covering with the added benefit of providing an early planting time for next spring’s crops. Oats are not winter hardy, but they will grow in the fall and die in the winter, leaving behind nutritious mulch that will easily decompose when incorporated into the soil in the spring. This is a great cover crop choice for low- or no-till gardens. Sow at 2 lbs. per 1,000 sq. ft. for the best coverage.
  • Winter Rye
    Sow 2-4 weeks before the first hard frost. This is a good choice for gardeners who have late season crops and don’t want to cut off that last harvest. If hardened off before frost arrives, winter rye will continue to grow over the winter. Rye is a vigorous grower and can be difficult to turn in the spring, so bear that in mind depending on what crops you will be planting in spring. Sow at 3-4 lbs. per 1000 sq. ft. for appropriate coverage.
  • Winter Wheat
    Sow 2-4 weeks before the first hard frost. Wheat will cover quickly but is not as aggressive as winter rye. Winter wheat is also leafier, making it easier than winter rye to turn into the soil in the spring. Sow at 3 lbs. per 1000 sq. ft. to provide good coverage.

Cornell University provides a tool to assist you in choosing the correct cover crop for your situation. (http://covercrops.cals.cornell.edu/decision-tool.php)

Planting Cover Crops

Before planting a cover crop, clean out garden beds, removing all roots and plant material. Compost all plant matter that is not diseased. Broadcast seed evenly and cover with soil. Water thoroughly when planting and when necessary during dry periods. In the spring, till or fork oats into the planting bed and you are ready to plant. For winter rye and wheat, mow or chop tops 4 weeks before planting leaving cut cover crop on top to dry. Till or fork dried wheat and rye into the bed before planting.

With the appropriate cover crop, you can protect your garden’s most valuable asset – the soil – and be sure it is ready for spring planting.

oats_250x250

rye_250x250

wheat_250x250

Audition Some Autumn Bloomers

Extend the beauty of your garden with vivid autumn-blooming perennials. When you think of fall-blooming plants, don’t stop at mums – there are many perennials that can add color to your yard at this time of year.

Top Autumn Bloomers

While there are different autumn-blooming perennials for different growing zones and climate conditions, some of the most popular and widespread options include…

  • Fall Daisies
    For fall daisies (besides daisy mums!) grow Boltonia or Nippon Daisy. Boltonia is a tall (3-4′) grower, suitable as a background plant. White or pink daisies are borne in profusion atop fine grey-green foliage. The Nippon Daisy (Chrysanthemum nipponicum) is covered with large crisp white daisies in October. Both love lots of sun and make excellent cut flowers.
  • Autumn Sedums
    Bold-foliaged sedums provide texture as well as color in a sunny place. Sedum ‘Autumn Joy’ is the most well known. It has coppery-pink flower heads. Sedums ‘Brilliant’ and ‘Stardust’, with soft pink and white flowers respectively, are also attractive. For a totally different color combination plant sedum ‘Vera Jameson’. It has gray-purple foliage with rose pink blooms and looks stunning when planted with Blue Fescue, Artemesia Silver Mound and other silver-foliaged plants. As an added bonus, all the sedums are attractive to butterflies.
  • Autumn Asters
    Asters are another fall bloomer that butterflies love. These perennials like sun and moist, well-drained soil. There are many colorful aster varieties in shades of pink, purple, blue and white. Some favorites include tall-growing aster ‘Alma Potschke’ with bright pink flowers, blue-flowered aster ‘Professor Kippenburg’ and low-growing aster ‘Purple Dome’ with its deep purple blooms.
  • Autumn Goldenrod
    Sunny yellow goldenrod (Solidago) is another bright addition to the fall garden. Wrongly blamed as the cause of fall allergy problems, goldenrod has rightly taken its place in the fall garden. It looks particularly effective combined with blue flowering plumbago, purple asters and ornamental grasses.

Fall Bloomers for Shade Gardens

Even shade gardeners can enjoy late blooming perennials. Tall growing Japanese Anemones are a stately addition to the perennial garden. Bloom colors range from pure white to various shades of pink, and flowers can be single, semi-double or double blooms. Anemones grow well in light to moderate shade and spread quickly to form large clumps, filling in space vacated by spent summer plants. Turtlehead (Chelone) is another fast spreader for shade. Rose pink flowers cover the tops of the plant from early September to October. For a deeply shaded location, try Toad Lily (Tricyrtis), which has clusters of beautiful cream flowers, spotted with maroon along its upright stems. For light shade, plant Blue Cardinal Flower (Lobelia siphilitica), whose intense blue spikes can be admired from mid-August until frost.

No matter what type of garden you have, the end of summer does not need to mean the end of colorful blooms. Instead, just opt for amazing fall bloomers and enjoy brilliant color even longer!

Audition_3

Audition_2

Audition_1

Fall-Blooming Camellias

We love camellias! An Asian native and an old southern standby, they are now a favorite in the northern states as well. In recent years, new varieties have been developed for their increased cold hardiness, giving northern gardeners even more opportunities to enjoy these charming beauties. Blooming in October, November and even into early December, fall-blooming camellias provide an abundance of colorful showy blooms that can now be enjoyed in colder climates.

Camellias do best in rich, moist, well-drained, acidic (5.5-6.5 pH) soil. Plant camellias in a location where they will be protected from the drying winter sun and wind or else the delicate blooms may suffer. Because these shrubs are shallow-rooted, they should be planted no deeper than they are planted in the pot that you purchase them in. Apply 3-4 inches of mulch to the root zone to keep soil moist and control weeds. Compost added to the soil can also help provide suitable nutrition to keep these plants healthy. Water camellias first when newly planted and frequently during times of low rainfall – a drip system can be a great option to keep these shrubs suitably moist. Fertilize in the spring with a fertilizer specified for acid-loving plants. If purchasing and planting camellias in the fall, be sure to give them a little extra TLC to help them through their first couple of winters and they will reward you with their beauty for years to come.

To help you choose the most beautiful fall-blooming camellias for your landscape, consider these attractive cultivar options!

  • Ashton’s Pride: Lavender-pink, single flowers with yellow centers
  • Ashton’s Snow: Creamy white flowers in semi-double blooms
  • Long Island Pink: Single blooms with bright pink colors and ruffled petals
  • Mason Farm: Pink, single flowers with a white tinge
  • Northern Exposure: Pink buds that open to single white, papery flowers
  • Winter’s Darling: Deep pink flowers with anemone shapes
  • Winter’s Fancy: Deep rich pink, semi-double blooms
  • Winter’s Interlude: Light pink blooms with anemone shapes and peachy centers
  • Winter’s Joy: Bright bold pink, semi-double blooms
  • Winter’s Star: Single lavender-pink pale blooms with yellow centers
  • Winter’s Water Lily: Elegant white flowers with a formal double shape

No matter which fall-blooming camellia you choose, if you give it the proper care, it will love you right back with abundant growth and stunning blooms that bring an air of southern charm and hospitality to your yard.

camellia_250x250_3camellia_250x250_1

camellia_250x250_2

Kale, the Super Food

Did you know kale is a super food? Kale belongs to the same family as cabbage, broccoli and Brussels sprouts. It is a rich source of vitamins C, A, & B6, and is loaded with manganese, calcium, copper and potassium, with no fat or cholesterol. Add it to your garden for a healthy harvest!

Planting

In the fall, set out transplants or sow kale seeds about 6-8 weeks before first frost in deep rich soil. Kale will need at least 6 hours of sun per day. Enrich your planting soil with plenty of compost. Planting kale in nutritious soil will promote faster plant growth and thus provide a tender, richer crop. Soil pH should be between 6.5 and 6.8. Sow seeds roughly one-half inch deep and thin seedlings to 8-12 inches apart to provide adequate air circulation. When thinning kale shoots, however, bear in mind that larger spacing will produce larger plants, larger plants produce larger leaves and larger leaves are generally tougher. Keep soil moist and mulch to control weeds. Water when planting and during dry spells.

Harvesting

Don’t worry about frost harming your harvest, a light frost will only enhance the sweetness of kale. Harvest the outer leaves of kale as they are needed for salads and recipes. Young tender leaves will grow from the center of the plant. Use the young leaves for salads and keep older leaves for cooking, which will help tenderize those larger leaves. Kale will continue to produce throughout fall in the warmer sections of our area. In low lying areas or where it is colder, use floating row covers or low tunnels to extend the life of your kale. Kale will bolt (elongate) and flower in the spring. This signifies the end, and it is time to pull it up and compost the remaining plant.

Cooking

Kale may be used fresh or frozen. It may be steamed or stir-fried, or used in soups, stews, omelets and casseroles. It is a tasty base for salads or can be added to sandwiches. It may be used in recipes as a replacement for spinach and collard greens. It even makes fantastic chips!

Kale Chips

  • Preheat oven to 425 degrees Fahrenheit.
  • Clean Kale and spin dry. Remove all the tough stems.
  • Drizzle about 8 cups of leaves with one tablespoon of olive oil and toss to coat.
  • Place Kale leaves in a single layer on a parchment lined cookie sheet.
  • Bake for 10-15 minutes or until leaves are crisp but not scorched.
  • Remove from oven and immediately sprinkle with generous amount of flaky sea salt.
  • Devour!

With so many tasty options for kale and so many nutritional benefits from this super food, there’s no excuse not to add this easy-to-grow dietary wonder to your garden!

kale_close_250x250

kale_250x250

Winter Pond Prep Checklist

Your pond can be an attractive and valuable focal point of your landscaping, but it can also be a delicate one. As winter approaches, certain steps should be taken to ensure plant and fish survival so your pond will still be at its best next spring.

  1. Clean Out Debris
    Use a netted scooper, a rake, your hands and, if possible, a pond vacuum to clean out pond debris. Rotting vegetation produces gas under winter ice that can be fatal to fish, frogs or other aquatic wildlife. This is also a good time to reduce any mud coverage over the pond’s bottom.
  2. Trim Pond Plants
    Trim and move hardy pond plants to the deep end of the pond (minimum 18” depth) to prevent them from freezing. Cut their vegetative growth back to about one inch above the soil line. Extra foliage will be more delicate and could rot over the winter. Especially be sure to trim any foliage that is already broken, wilting or damaged.
  3. Remove Tropical Plants
    Tropical plants or any delicate vegetation should be removed from the pond and placed in a basement or garage where they will not freeze. Keep plants moist throughout the fall and winter months until it is time to return them to the pond.
  4. Disassemble Summer Equipment
    Remove and clean the pond pump and waterfall or fountain feature (if applicable). Store them inside for the winter. See your maintenance guidelines for proper storage recommendations to keep the equipment in peak condition.
  5. Clean Pond Filter
    Thoroughly clean the pond filter and inspect it for any damage. If necessary, repair or replace the filter.
  6. Change Fish Diet
    Feed fish with spring/autumn food mixtures to provide good nutrition for their slowing metabolism. Stop feeding them completely when temperatures drop consistently below 50 degrees Fahrenheit. Avoid overfeeding, which would contribute to excess debris and decay in the pond over the winter.
  7. Set Up Pond Heater
    If needed, set up your pond heater for winter use. Test the equipment to be sure it is functioning properly and make any repairs or adjustments as needed.
  8. Cover the Pond
    Cover your pond with netting, screening or a shade cloth to minimize debris that will fall into the water throughout the winter. Secure the perimeter with sod staples or rocks to prevent the covering from blowing away. This will make spring cleanup and restarting your pond much easier.
  9. Relax until spring!
    Your pond will be ready for warmer temperatures when you are.

pond_250x250_2

pond_250x250_1

Bring on the Bulbs for Better Home Value

Many homeowners, whether they just purchased their home or have owned it for years, are interested in increasing the value of their property. A better value leads to greater home equity, a higher resale price and the personal pride of owning a lovely home. Good landscaping can lead to a better home value, and there’s no easier way to improve landscaping than with beautiful bulbs.

How Landscaping Adds Value to Your Home

A well-groomed, thoughtfully planned and attractively maintained landscape is a great asset to your home. Your home’s exterior, including its landscaping, is the first impression visitors see, and good landscaping creates an attractive, welcoming atmosphere. Colorful landscaping can help attract notice to your property, while larger plantings provide shade and help with temperature control. Borders can conceal fences or unsightly foundations, and flowerbeds soften the edges of the house structure to provide an appealing sense of nature. Unlike interior home improvements that come and go with the latest design trends, good landscaping is a constant asset to your property and your home value.

Why Bulbs Are Best

Bulbs are some of the best options to improve your home’s landscaping and increase your home value. While bulbs won’t grow to provide shade to your yard and don’t yield tasty treats in a garden, they have many benefits that add solid value and enjoyment to any yard.

  • Bulbs Are Familiar
    Unlike exotic tropical plants or little-known cultivars of tree and shrubs, many bulbs are instantly recognizable. That familiarity is comfortable and reassuring, and adds a sense of peace to your landscaping. Tulips, daffodils, hyacinths, crocuses and lilies are some of the most popular and tried-and-true bulbs that can enhance your landscaping.
  • Bulbs Are Versatile
    While many plants can serve only one distinct purpose, bulbs can serve many purposes. Taller varieties can provide an effective screen for privacy or create stunning borders. Dense bulb patches can “paint” your landscape with flowing color, or bulbs can be layered in pots or containers for instant beauty. Bulb flowerbeds can be positioned along your home’s foundation, around trees or lining walkways, driveways or sidewalks. Bulbs can be strategically positioned to fill in thinner areas in your yard or landscaped beds as well.
  • Bulbs Are Beautiful In Different Seasons
    While a spring-blooming annual or a brilliant fall foliage tree may look stunning for one season, many bulbs offer beauty for far longer. Not only are their flowers showstopping beauties, but many bulbs have thick, graceful foliage that is delightful long after blooms may have faded. Furthermore, you can mix-and-match bulbs to keep a bed blooming from early spring to late fall without difficulty.
  • Bulbs Are Perennials
    Annual flowers are gorgeous but need to be replaced every year, a process that can be very time-consuming and labor-intensive. Bulbs, on the other hand, are perennials that will keep coming back year after year with very little extra care. With just basic maintenance – watering and the occasional removal of dead foliage – bulbs will grow back more lush and vibrant each year, continuing to add value to your home.
  • Bulbs Are Easy
    There’s no denying that bulbs are easy to grow and require very little maintenance to look their best. Bulbs can tolerate a wide range of soil types, pH levels and sunlight levels, and they often thrive even when neglected. This makes them an easy addition to any landscape, bringing their proven value to your yard quickly.

Improving Your Landscaping With Bulbs

It’s easy to improve your home’s value by adding bulbs. Simply choose the types and colors of bulbs you want, and you’re just three steps away from a beautiful landscape and a more appealing home.

  1. Dig – Dig the appropriate hole to plant your bulbs, paying attention to the recommended depth for the bulb type. You can dig individual holes for each bulb, or plant an entire bed at once.
  2. Drop – Drop the bulbs in the holes. You can position them in graceful, cultivated rows, or choose a more organic, natural look. Cover the bulbs firmly with soil and a layer of mulch if desired.
  3. Done! You only need to keep a simple eye on moisture levels and the occasional critter that may enjoy a bulb snack, and you’re done with bulb care and maintenance. Before long, both your bulbs and your home value will be blooming!

With so many benefits from landscaping and the ease of bulbs to create a stunning look, why not add to your home’s value today? Get digging – you’ll be done before you know it!

Fairy Garden Magic

Do you think your tiny balcony terrace means you can’t have a grand garden? Are you looking for a clever and imaginative way to introduce a child to the world of plants? Have you ever dreamed of your own “McGregor’s Garden?” One of the newest gardening trends can do all these and a whole lot more!

Start planning…and playing…in your fairy garden!

About Fairy Gardens

One of the newest gardening trends, fairy gardening is the new-and-improved miniature gardening of yesteryear with all sorts of new products, idea books and plants. Despite their small size, the themes, designs and creativity of these tiny garden spaces is boundless. Any container, nearly any type of plant and any type of design can add a bit of garden magic even to a tiny space. Go small and have fun.

Designing a Fairy Garden

You can create your fairy garden just about anywhere. For portability, consider a pot, basin or terrarium. Or, for a more rustic appeal, plant an old lunchbox, garden bucket or child’s wagon. Old shoes, a stack of broken pots, a rusty wheelbarrow or a concrete bird bath are other great planting options.

Fairy gardens can be positioned anywhere. A smaller design can be a fun centerpiece to patio furniture, or it can be part of an entryway display. To heighten the intrigue, find a secret place in your own garden to lure the garden fairies. Between tree roots, beside a water feature or in a grove under flowering shrubs… The possibilities are endless.

Design the overall look of your fairy garden just as you would a larger garden. What is its theme? Is it a fantasyland for unicorns? A gnome family farm? A replica of your own big house? It can be anything you imagine. Consider tiers, layers and depth as well to create a truly impactful scene in your miniature fairy world.

If you’re having trouble coming up with an idea, visit your garden center to check out all the products. If you need some inspiration, our Enchanted Garden products by Grassland Road will get you started. Whimsical and charming, they’ll help you create your own mini-fantasy scene. From arbors and benches to umbrellas and miniature tools, the possibilities are amazing. If you’re not sure your resident garden fairies will understand your invitation, you can always buy a mannequin fairy to entice them to share the fun.

This visit also sets the mind whirling with ideas for plant materials. Consider the mixture of colors, textures, shapes, and scents… in miniature. Tiny groundcovers such as moss or creeping thyme create beautiful “lawns.” Pebbles become paths. Sand creates shores. Twigs make houses, fences and other structures. What can you do with a small pinecone or acorn? How can you recreate a Disney-type pumpkin carriage?

Creativity knows no limits, and the fairies will love you for it!

minigarden_250x250_3

gomegarden_250x250

minigarden_250x250

Autumn: Why Plant Now?

Although many gardeners plant trees and shrubs in the spring, knowledgeable gardeners plant in the fall to take advantage of all this fabulous season has to offer. But why is fall planting better than spring planting?

  • Stress Reduction
    Transplanting causes stress as plants are removed from containers, balls or established locations and changed to new locations. Planting in the fall, when a plant is entering dormancy and is generally hardier and sturdier, reduces this stress so the plant can thrive.
  • Establishing Strong Roots
    Fall planting “establishes” trees and shrubs by encouraging root growth. Because the soil is still warm, the roots continue to develop until freezing, though the upper parts of the plant are already dormant. When transplanting in the spring, the developed roots are active and delicate tips or rootlets, as well as buds and new leaves, are more easily damaged.
  • Weather Resiliency
    Trees and shrubs planted in the fall are better able to withstand the rigors of the next summer’s heat and dry conditions because they have much longer to develop healthy roots systems and become thoroughly established.
  • Faster Maturity
    The “head-start” of fall planting results in a larger plant in less time, helping create a mature landscape without waiting for smaller plants to catch up. This can be especially critical when replacing dead or damaged plants in a mature landscape to avoid a gap or uneven look.
  • Water Conservation
    Planting in the fall saves watering time and promotes conservation by reducing daily watering. Cooler temperatures with the addition of both morning and evening dew contribute greatly to soil moisture availability in fall without as much supplemental watering.
  • Color Confirmation
    Fall is the best time to see a plant’s autumnal color. Planting in the fall eliminates the surprise of the wrong color or unexpected shades that may not coordinate with nearby plants. By planting in autumn, you’ll know exactly what you’re purchasing and planting, and you will be able to match better with your existing landscape.
  • Saving Money
    Last but definitely not least, buying your beautiful trees and shrubs in autumn can save big money. Watch Wedels.com for discount prices on trees and shrubs. Soon, we’ll need to create room for holiday season materials so we’ll pass the savings on to you. (Selection may be more limited later in fall, however, so don’t wait too long to take advantage of great savings!)

Autumn can be the ideal time to plant trees and shrubs, whether you are adding to your landscape, replacing plants or starting a whole new look. If you plant in autumn, you’ll be amazed at how lovely your landscape will look next spring. Check with our Certified Green Industry Professionals to help you choose the plants that will do best in your landscape.

AutumnWhyPlant_2

AutumnWhyPlant_3

Deterring Deer

Deer may be beautiful and elegant, but they aren’t always welcome in the garden. Even just a few visiting deer can tear up a landscape, eat an entire crop, destroy a carefully cultivated bed and cause other havoc, such as creating a traffic hazard, damaging bird feeders or leaving behind unwanted “gifts” on sidewalks and pathways. But how can you keep deer out of your yard and away from your garden and landscape?

Popular Deer Deterrent Techniques

People try all sorts of home-grown methods to keep deer from destroying their landscape and gardens. Some of the more common tactics include…

  • 8 ft. fencing, including wire or electric fences
  • Big, loud dogs on guard in the yard
  • Deer repellents such as commercial chemicals
  • Predator urine or other anti-deer scents
  • Motion detectors connected to lights or sprinklers

All of these methods work but are limited in their effectiveness. Fencing is costly and unsightly. Repellents and urine wash away. Sprinklers or lighted areas can be easily avoided. So what can you do to keep deer away permanently?

Deer are creatures of habit and they are easily scared. Anything you can do to mix up their habits or make them think there is danger nearby might be enough to make them go elsewhere in search of food. But deer aren’t foolish and if they realize the danger isn’t real, they will return. Therefore, you must rotate any scare tactics you try and reapply repellents frequently. This can be a lot of work to keep your garden safe, but you can make your garden do the work for you.

Plants Deer Won’t Like

While deer in large herds with insufficient food will eat almost any garden vegetation, particularly in harsh winters, you can opt for plants that aren’t popular with deer to minimize deer damage. At the same time, avoid planting favorite deer plants, such as azaleas, rhododendrons, yews, roses, Japanese maples, winged euonymous, hemlocks and arborvitae, as well as any edible garden produce.

So what can you plant in your landscape to discourage deer? There are many attractive plants deer will avoid, including…

Trees

  • Chinese Paper Birch
  • Colorado Blue Spruce
  • Dragon Lady Holly
  • Douglas Fir
  • Japanese Cedar
  • San Jose Holly
  • Serviceberry
  • Scotch Pine

Shrubs & Climbers

  • Barberry
  • Bearberry
  • Blueberry Elder
  • Boxwood
  • Caryopteris
  • Common Buckhorn
  • Creeping Wintergreen
  • European Privet
  • Japanese Andromeda
  • Japanese Plum Yew
  • Leucothoe
  • Rose of Sharon
  • Russian Olive

Try using these less deer-friendly plants to create a dense border around your yard and garden area, and deer will be less inclined to work their way toward the tastier plants. When combined with other deterrent techniques, it is possible to have a stunning landscape without being stunned by deer damage.


deer_1

Fall Has Arrived But Spring Is Already in Our Sight

It’s a sure sign that fall has arrived when dozen of boxes and crates, adorned with brilliant images of spring-blooming bulbs, appear on garden center shelves. Take a closer look through the pretty packaging, however, and what you see may seem totally unimpressive. It is hard to believe that in just a few short months these diminutive, subterranean dynamos will blossom into amazing forms of living art. What is even more incredible is how very simple and absolutely foolproof it is to achieve this beauty, no matter what shade of green, brown or black your garden thumb may be. These petite organic parcels encapsulate everything necessary to burst into astonishing flowers, and even the most inexperienced gardener can be a floral artist with spring bulbs.

Bulb Varieties

The only difficult thing about growing spring-flowering bulbs is choosing which blooms to showcase in your yard. The sheer variety of flower types, colors, sizes and bloom times is outstanding and virtually limitless, which can be overwhelming. Tulips alone are available in early, mid- and late-blooming varieties in just about every color under the sun, including multi-colored and variegated shades. The stems can be short or long, and the petal count may be single or double. The petals may be colorfully veined, like the ever popular parrot tulip, or fringed on the edges for a lacy look. Some tulips resemble peonies and some resemble crocuses. And that’s just tulips – other spring-blooming bulbs can have just as many varieties to choose from!

This fall, just about every garden center will be carrying at least a few varieties of ever-popular, widespread favorites, such as…

  • Allium
  • Crocus
  • Daffodil
  • Dutch Iris
  • German Bearded Iris
  • Grape Hyacinth
  • Hyacinth
  • Narcissus
  • Tulip

Then there are the specialty spring-flowering bulbs that may not be as familiar, but are stunning additions to the spring landscape, such as…

  • Anemone
  • Belladonna Amaryllis
  • Cassima
  • Chionadoxa
  • Freesia
  • Fritillaria
  • Ranunculus
  • Snowdrop
  • Wood Hyacinth

These are just a few examples of the amazing variety of bulbs available. Which new ones will be the showstoppers in your yard next spring?

Growing Bulbs

What’s most exciting is that if you’ve got soil and sunlight you can grow bulbs. It is absolutely that simple. Where you garden makes no difference at all, whether it is in the city, suburbs or countryside. Bulbs look fantastic blooming in a large landscape, small garden or simply in a pretty pot. They can be planted around trees and bushes, alongside driveways or sidewalks, or even in broad, flowing beds. Because they require very little care and maintenance, bulbs are ideal for busy gardeners or anyone who wants to stick their thumb in the soil but may not have much time to devote to an intensive flower garden or elaborate layout. There are just three steps to growing bulbs…

  1. Dig: Dig the hole of an appropriate depth for the bulb size – but they aren’t too picky!
  2. Drop: Drop the bulb in the hole, covering it firmly with soil and a layer of mulch if desired.
  3. Done! That’s it – the bulb will do the rest with the nutrients it has stored. Just be sure it has water at the appropriate time, and the blooms will amaze you.

So why not get out there and explore this big beautiful world of bulbs? Plan now for your spring floral explosion, and ask your local garden center staff for ideas for the best bulbs to suit your landscape, soil type and climate. Use the web resources, like Pinterest or Instagram, for information and inspiration. Get to your garden center early for the best bulb selection and get excited for unbelievable blooms!

Birdscaping

As wildlife habitats are threatened by development, the creation of a bird-friendly environment that provides food, water and shelter is crucial to the existence of our wild bird population. Caring for our feathered-friends is an educational and enjoyable activity for the entire family that brings beauty and song to our lives.

Benefits of Wild Birds

Birds are great guests to have in your yard, garden or landscape, and they provide more benefits than many homeowners and gardeners realize. Wild birds can…

  • Control insects by feasting on both flying and crawling insects, as well as spiders, slugs, snails and other creepy-crawlies.
  • Pollinate plants by flitting from flower to flower as they seek out insects or eat seeds, taking pollen along between blooms.
  • Manage weeds as they consume copious amounts of weed seeds before the seeds ever have a chance to sprout.
  • Control rodents when raptors visit the yard in search of mice, rats, gophers, voles or other unwanted pests.

Attracting Backyard Birds

Fortunately, it is easy to attract a wide variety of backyard birds when you offer them what they need most – food, water and shelter.

Food for Birds

Wild birds rely on both natural and supplemental food supplies so it is important to consider both when birdscaping. Feeding the birds is most important in the winter when natural food is scarcer, but they will visit feeders at any time of year. Migratory birds require additional food in the spring and fall as they pass through the region and nesting birds will utilize feeders in the summer.

Tips:

  • Provide a variety of natural foods for birds by planting berry bushes, seed-bearing flowers, nectar-rich flowers and sunflowers. Leave windfall fruit on the ground for birds to nibble. Minimize pesticide use so birds can feast on insects as well.
  • Add supplemental feeders to your yard, such as birdseed feeders, suet feeders and nectar feeders. Clean feeders weekly to avoid mold that can be dangerous to birds, and be sure feeders are full when birds need them most.

Water

Improve your backyard bird habitat by adding water. Birds require a constant supply of clean water for drinking and bathing. This is especially important in late summer, when water is scarce, and in the winter, when it is frequently frozen.

Tips:

  • Place bird baths in a protected location safe from predators, and keep the baths filled at all times so a fresh supply of water is constantly available.
  • Scrub off algae as soon as it is appears and thoroughly was the bird bath each week to minimize feces contamination or other messes in the water.
  • Provide motion for greater attraction by using a bubbler, wiggler, dripper or fountain. Birds will see the sparkles of the moving water and will hear the splashes from great distances, so more birds will visit.
  • Use Mosquito Dunks to safely prevent mosquito larvae in warm weather. A clean bird bath with moving water will also harbor fewer insects.
  • Add an outdoor-safe submersible heater to the bath in winter to keep the water liquid instead of frozen, or consider using a fully heated bird bath during the coldest months.

Shelter

It is important to offer safe and comfortable shelter for your wild birds to nurture their young, protect them from predators and shield them from the elements. Planting evergreen trees and shrubs and providing bird houses, along with roosting boxes and pockets, are all beneficial additions to your birdscape.

Tips:

  • Choose both deciduous and evergreen landscaping trees and shrubs to offer birds different types of shelter in all seasons.
  • Minimize pruning to give birds denser, more secure shelter to take advantage of when they feel threatened.
  • Plant in layers and create thicket-like pockets or corridors in your landscape so birds can move around freely without feeling exposed.
  • Supplement the shelter in your yard with good quality bird houses, winter roost boxes or nesting pockets to give birds even more options to stay safe and secure.

When you meet birds’ needs for food, water and shelter, your birdscape will soon be home to a fun and friendly flock of backyard birds.

Birdscaping_3

Birdscaping_1

Birdscaping_2

Shrub Bouquets

Do you love fresh, seasonal bouquets straight from the garden but don’t have the time to plan, plant and tend to an annual cutting plot each year? A fabulous alternative to the annual flower garden is the planting of woody shrubs. Woodies are a great investment that will reward you year after year with little maintenance. These are hardy, easy care shrubs whose flowers, foliage, berries and stems may be cut, without damaging the overall plant. Clippings from these plants may be used alone, in bouquets and arrangements or mixed with the annual and perennial flowers that you do have time to nurture and grow. No matter what the season, there are amazing shrubs that can easily become part of beautiful bouquets. Why not choose one of each for year-round options?

Spring Bouquet Shrubs

  • Common Lilac (Syringa vulgaris): White, pink, lavender or variegated fragrant blooms depending on the cultivar.
  • Flowering Quince (Chaenomeles speciosa): White, apricot, salmon, pink and red flowers depending on the cultivar. Branches may be forced.
  • Forsythia (Forsythia x intermedia): Yellow to gold flowers depending on the cultivar. Branches may be forced. Foliage may be used, after flowering, in the summer, winter and fall.
  • Pussy Willow (Salix spp.): Soft, fuzzy catkins (flowers). There are also numerous Salix grown for their colorful and twisted stems.

Summer Bouquet Shrubs

  • Bigleaf Hydrangea (Hydrangea macrophylla): White, green, pink, blue and purple flowers depending on the cultivar and soil pH.
  • Hardy Hydrangea (Hydrangea paniculata): White or pink flowers depending on the cultivar. If cut correctly, you may even get a second crop of blooms from this plant.
  • Ninebark (Physocarpus opulifolius): Deep burgundy, lime green, bronze or coppery-orange foliage depending on the cultivar. Foliage may be used in the late spring through the fall.
  • Smooth Hydrangea (Hydrangea arborescens): Large, white snowball-like flowers.
  • Smokebush (Cotinus coggygria): Bluish-green to dark purple foliage depending on the cultivar with smoke-like flower panicles in June through August. Foliage is attractive from late spring through fall.

Fall Bouquet Shrubs

  • Blue Mist Spirea (Caryopteris x clandonensis): Light, bright and deep blue flowers depending on the cultivar.
  • Heavenly Bamboo (Nandina domestica): Full, drooping panicles of yellow or red berries depending on the cultivar. Foliage may be used any time of the year, even in winter as this plant is semi-evergreen, and takes on a purple or bronze cast in the cold weather.

Winter Bouquet Shrubs

  • Bayberry (Myrica pensylvanica): Silvery blue berries.
  • Twig Dogwoods (Cornus spp.): Yellow, gold, orange or red stems depending on the cultivar.
  • Winterberry Holly (Ilex verticillata): Yellow, orange or red berries depending on the cultivar. Must plant a male pollinator in order for this plant to fruit.

ShrubBouquet_2

ShrubBouquet_3

ShrubBouquet_4

ShrubBouquet_5

ShrubBouquet_1

Watering Tomato Plants

Proper watering plays a significant role in producing a healthy tomato plant with tasty, meaty, juicy fruit. So, what’s the secret, and how can you be sure you are watering your tomatoes the right way?

Watering Location

Always water tomatoes at the root zone; never overhead water your tomato plant. Watering directly at the soil level will strengthen the plant’s root system and ensure the maximum amount of moisture reaches the roots. When you overhead water, much of the water will not make it to the roots as it evaporates before reaching the soil. Water droplets on plant leaves act as a magnifying glass and can burn tender plant tissue, damaging foliage that is essential to keep the plant healthy. Water dripping from leaf to leaf can also spread disease, infecting an entire crop. To be sure tomatoes are not being watered inappropriately, keep plants out of reach of lawn sprinkler systems or other inadvertent watering.

Watering Speed

Slow watering is essential to properly distribute moisture to a tomato plant. Allow the water to drip slowly into the soil, giving the plant roots time to absorb the moisture. A drip system is best and will also help with water conservation. Avoid using a hand held hose, as it is easy to either underwater or overwater using this method. Water to a depth of 8 inches to ensure all roots have access to adequate moisture. You can also use a watering reservoir, such as a gallon jug with several small holes in its bottom, to slowly and carefully water the plants without flooding the root zone.

Watering Frequency

A regular watering schedule is essential for the healthiest, most productive tomato plants. Water consistently to produce larger fruits and to avoid split and cracked fruit and blossom end rot. Tomato plants should be watered 2-3 times a week in the height of summer or when natural rain is lacking. A deep soaking rain counts and supplemental watering should be adjusted whenever Mother Nature lends a hand with watering chores. The top inch or two of soil should dry out between watering to be sure the plant is not getting too much moisture.

Watering Adjustments

There are several times when it may be necessary to adjust where, when and how much you water your tomatoes. Changes in local rainfall – increasing spring or summer rains, a sudden storm, an unexpected drought – can require changes in supplemental watering to keep the moisture to your tomatoes consistent. As plants grow and more fruit appears, more water may be needed to meet the plant’s watering needs and keep it lush and healthy.

By understanding the basics of watering tomatoes, you can keep your plants well hydrated without risk of either overwatering or underwatering, both of which could be disastrous for your tomato crop.

WaterTomato

Growing Exotic Citrus

Citrus trees grown in fancy terra cotta pots, light-weight decorative containers or wooden planters can be used to adorn your garden, no matter how small it is. Use a potted citrus as a centerpiece for an herb garden, place several in a series on your steps or decorate your deck with these grand-looking accent plants. Dark, glossy green leaves look beautiful all season long while colorful, healthy fruit dangles enticingly from the branches. Although citrus plants are not winter hardy in the north, they may be moved indoors during this time. For added pleasure, citrus offers weeks of fragrant flowers in the spring.

Top Citrus Picks

There are several varieties of exotic citrus trees that can be stunning in the landscape. The most popular options include…

  • Calamondin Orange – This cross between a mandarin and kumquat produces miniature oranges that are somewhat tart but make excellent marmalade.
  • Ponderosa Lemons – Producing fruits that weigh up to a whopping 5 pounds each, Ponderosa Lemons have a thick ring with very little juice.
  • Variegated Pink Lemons – This lemon has variegated foliage and produces a yellowish-pink fruit.
  • Meyer Lemon – Although not a true lemon (it is said to be a cross between a lemon and either an orange or mandarin), the Meyer Lemon is one of the sweetest lemons.
  • Key Lime – Also known as Mexican Lime, this selection is highly prized for making Key Lime Pie. The plant is very thorny and produces small aromatic fruits.
  • Goliath Pummels – The largest of all citrus fruits, pummels taste similar to grapefruit.
  • Blood Orange – Having an unusual red flesh, these oranges are prized by gourmet cooks for their slight berry-like flavor.
  • Flame Red Seedless Grapefruit – This grapefruit variety produces medium-sized pinkish-colored fruits.
  • Cocktail Trees – These are a grafted tree that usually contains 4 to 5 different types of citrus on the same plant, great for your own fruit salad in minimal space.

Citrus Care

Place citrus plants in a sunny location where they will receive a minimum of 6 hours of sun to ensure the best possible fruit. Water regularly and feed with a fertilizer listed specifically for citrus plants every two weeks. During the summer months, citrus plants will produce a lot of new growth. In the early fall, before bringing plants indoors, prune citrus plants back about 1/8 of their existing size. This will help to minimize the shock that plants often experience when being moved. Use a humidity tray indoors or mist daily. Avoid placing your plant in a drafty area or by a heating vent. Provide a minimum of 6-8 hours of daily sun or very bright light in the winter months. It may be necessary to supplement with an artificial light source at this time of the year to keep the plant at its best.

It may seem unusual to have strange citrus trees in your yard or even right inside your home, but with a little care, you’ll be amazed at how much fun these plants can be to grow, and their sweet fruit is a wonderful reward for your efforts.

citrus_1

Jump Start Your Pond

Are you ready to get your pond started up for another beautiful spring and summer? It can be a big job to rejuvenate such a large water feature so it remains balanced and healthy after a long, harsh winter, but with a few careful steps, your pond can be back in shape in no time.

When to Reopen Your Pond

It is important that you don’t try to get your pond started too early in the season. All risk of hard freezes should be long past, and even nightly frosts should be tapering off or already finished before you restart your pond. The exact time will vary based on your pond’s size, depth and location, as well as your ambient weather conditions and the pond’s overall ecology. For example, a smaller, shallower pond in a sunny area will be warmed up and ready to restart before a larger, deeper pond in a shady spot. It can be helpful to keep a journal or calendar from year to year to note when you reopened your pond and how successful your efforts were. In time, you’ll be able to adjust your calendar easily without risking the health and wellness of your pond, even if annual conditions change.

Easy Steps to Restart Your Pond

When you are ready to jump start your pond…

  • Remove the netting that was set in place last fall. If needed, clean and make repairs to the netting right away so it will be ready to use next fall. Store it safely where it will be easy to reach when needed again.
  • Remove excess sediment from the bottom of the pond with a vacuum or a net. It is not necessary to remove every bit of sediment, but most of the debris should be removed so the pump can function effectively.
  • Test last year’s pump and replace if necessary. Be sure to test any additional moving or electrical features, such as waterfalls, fountains or lighting around the pond so repairs can be made if needed.
  • If water level is low, add fresh water to desired height. Avoid overfilling the pond, however, which can disrupt the essential chemical and microbial balance that keeps the pond healthy.
  • Add de-chlorinator as necessary to remove heavy chemicals from the water that has been freshly added to the pond. As with any chemical treatments, be sure to test the water several times to be sure you reach the proper balance.
  • Place aquatic plants in the pond and begin fertilizing to meet their nutritional needs. These may be plants that you’ve overwintered in a safe location, or you may choose to add new or exotic plants in late spring.
  • Begin feeding fish when water temperature stays above 55 degrees. Keep feedings minimal at first as fish come out of dormancy, as excess food will only rot and lead to greater bacteria and algae growth in the water.

It is perfectly natural for your pond water to turn green at first, but with the proper plants it should balance itself out in no time. It may take a few days or even a couple of weeks for your pond to return to its healthy, active state, but if you’re restarted it properly, you shouldn’t have any major problems.

pond

Ladybug or Lady Beetle?

The different names given to ladybugs are almost as numerous as the number of species. But bug or beetle, understanding more about these garden guests can help you better appreciate their diversity and all the help they can offer in your garden and landscape.

What’s In a Name

You may call them ladybugs (although they are not really bugs), lady beetles (they are technically beetles), lady birds or in Germany you would say “Marienkafer” (Mary’s beetles). In North America, there are more than 350 distinct species of ladybugs, and there are more than 4,000 ladybug species around the world. Most species can be identified by the pattern of spots on their elytra (flight wing covers). In many areas, these helpful insects go by different common names, including lady fly, lady cow, little hen, insect of fortune, Mary’s bug and more.

About These Bugs

Lady beetles are members of the beetle family Coccinellidae, which means “little sphere.” In their life cycle, a lady beetle will go through egg, larval, pupal and adult stages, though the length of each stage and how quickly the beetle proceeds through each one will vary depending on the species and local conditions. Lady beetles may live in shrubs, fields, trees and logs.

Lady beetles’ favorite food is the notorious aphid, though they do eat a variety of different insects. A female lady bug has huge appetite, eating from 75-100 aphids per day, while the male eats about 40 per day. This makes them ideal garden helpers, and many gardeners deliberately release swarms of lady beetles to help control aphid outbreaks. Most lady beetles are predators, but a few are plant eaters, and can be crop pests if not controlled appropriately. Crops most at risk from certain lady beetle species include potatoes, beans and different types of grain. When lady beetles swarm in vineyards and are inadvertently pressed with wine processing (it inevitable that some insects are part of the process), they can impact the taste of the resulting wine.

Self-Preservation

Lady beetles have some surprisingly innovative ways of protecting themselves. First of all is their coloring. Most predators know that bright colorings mean that their victim would likely taste gross, usually sharp or very bitter, and bold colors can even indicate poisons or stinging. While lady beetles don’t sting, their bold red and black coloration can easily mislead predators. Lady beetles also produce a pungent odor when threatened or may just play dead. As well, the lady beetle larvae is kind of alligator looking, so not many predators will not mess with it.

Ladybugs and lady beetles are fascinating insects, well known to gardeners throughout the world. The more you know, the more you’ll respect and appreciate these iconic insects.

ladybug_article3ladybug_article2ladybug_article1

Espalier

Espalier is the process of training trees or shrubs, by pruning and trellising, to create a vertical, two-dimensional, formal pattern. The purpose of espalier is to artfully train a tree to grow in limited space, to provide pattern and texture on a solid wall, to grow fruit in a limited space and to create privacy in the garden.

It is possible to purchase plants that have been already been espaliered, however, your selection of plant choices will be limited and it’s not nearly as much fun as doing it yourself. Fortunately, it’s not as hard to do as it may sound!

Espalier Basics

To begin, choose a spot in full sun where you have garden space at the foot of a bare wall or fence. It is important to remember to leave about 6 inches of space between the wall or fence and the plant to allow sufficient room for roots to grow. A wire frame is often used in place of a trellis when choosing this type of plant training, though a trellis may be used when training a plant for privacy when no wall is available. Screw eyebolts into the side of a building at 1-foot intervals, horizontally and vertically. Tie wire between the bolts to create a grid. There are many styles and patterns, of espalier to choose from, some simple, some complicated. It may help to layout your design on graph paper first to solidify your plan and to visualize its complete form.

Select a tree that is young as its branches will be more flexible and more readily trainable. All branches must be pruned from the side that will be flush with the wall or trellis. Tie the main trunk to the wire grid with a twist tie, then prune away all branches that grow forward leaving only laterally spreading branches. Next, begin tying the lateral branches to the frame at approximately a 45-degree angle from the ground. You now have the beginnings of an espalier! This process will require annual maintenance. Branches chosen to be part of your original design should be retrained and retied yearly. Check the ties twice a year to make sure that they are not strangling the branches, and loosen them as necessary. Branches that are not needed to maintain your design should be removed.

Pruning Your Plant for the Best Espalier

Pruning and training will continue throughout the life of your chosen plant. Generally, most major pruning is done in late winter to early spring before new growth begins, but pruning at different times can have different advantages. Pruning during the dormant season or early spring, for example, will stimulate new growth that can help fill a pattern in more quickly. Pruning in mid-summer (June, July) tends to have a dwarfing effect, ideal to keep a more mature plant under control in a smaller space. Pruning should not be done in late summer, however, as this could stimulate new growth that will not have time to harden off before a heavy frost sets in.

An espalier design can take years to fill into a luxurious form, but the effort and meticulous nature of this type of plant training can be well worthwhile for a unique and eye-catching feature in your garden.

Apple Fruit.

Crape Myrtles

No yard or landscape should be without a crape myrtle, or two, or three or… many! How wonderful to have something that blooms so profusely during that time of year when most other plants are looking tired and worn from the summer heat and drought. The versatility of this plant makes it suitable for many types of yards and many uses, and once established, they will go on to add charm and delight to the landscape for many years.

About Crape Myrtles

Crape myrtles bloom in late summer and can be found in flower colors of pinks, lilac, white, reds and purples. Requiring very little maintenance once established, crape myrtles need a full sun location to thrive and they do not like wet feet. Keep these needs in mind when selecting a site to plant them. They will require some supplemental watering for the first year or so to get off to a good start and develop good roots. Crape myrtles are also pretty much pest-free, except for aphids on occasion and these are easily controlled with an insecticidal soap spray. Some varieties are more susceptible to powdery mildew than others but most of the newer varieties are more resistant to this fungus problem.

Planting Crape Myrtles

Although tolerant of a wide range of soil qualities, crape myrtles grow poorly in wet locations so be sure to select a well-drained planting site. Late spring to early summer is the best time to select and plant your new crape myrtles while they are actively growing and can settle in quickly. Plant at or slightly above ground level, spreading the roots out slightly and using mulch to protect and shelter the roots after planting. They do prefer a slightly acid soil.

Crape Myrtle Types

Crape myrtles can be found in shrub, multi-stem tree and single trunk tree forms. For best results select a cultivar whose growth characteristics and ultimate mature size fit your intended use. Planting a shrub- or tree-like crape myrtle in an area of limited space will require yearly pruning to keep it from outgrowing its place. Single- or multi-stemmed tree-form crape myrtles are ideal as flowering specimen trees or as small, flowering shade trees near patios, walkways and entrances. Shrub forms make an excellent accent in a shrub border when planted in groups. Dwarf plants are effective as large groundcovers, perennial bedding plants or container plants providing vivid, summer-flowering interest.

Pruning Crape Myrtles

If adequate room is provided, little pruning is required except to maintain shape or remove any dead or crossing branches. Remove any suckers or water sprouts to maintain tree forms and elegance. Blossoms are produced on new growth so you can prune anytime the plants are dormant through the winter.

With so much to love about these plants, there’s no reason not to add one to your yard this year! And next year, and the year after that, and the year after that…

Edging and Trimming

Edging and trimming the lawn is like having a manicure after cutting your fingernails. It smooths out any roughness and adds an elegant finishing touch to your landscape, and everything is just more perfect! But which lawn care activity is which, and how do you do them properly to give your lawn that manicured look?

Edging or Trimming – Which is Which?

Before you pull out the lawn tools, it’s important to know which activity you need to do to create the look you want.

  • Edging
    When you are edging, you define the line between a hard surface (sidewalks, driveways and curbing) and a growing area such as a flower bed, garden or lawn. To achieve this, a vertical cut is made between the two using a spade or edging tool. Some have mastered the art of using the string trimmer to do this. This creates a crease-like separation between the organic (growing) and inorganic (non-growing) surfaces. Properly done, edging will help minimize weed growth in these cracks and crevices and gives the landscaping a smooth, formal appearance.
  • Trimming
    Trimming removes the grass, weeds and other plants from areas a lawnmower can’t reach. Long wisps of grass along the side of the house, fence or other structure aren’t very attractive, and trimming them away will give a finished, uniform look to the landscaping. Most people use a string-trimmer or bladed trimmer for this work, but hand shears also do the job. Trimming is also often done around trees or in tight corners where a lawnmower is less effective.

When to Do Edging and Trimming

How often should trimming and edging be done? This depends upon your own personality. Some people feel edging and trimming is a requirement of every mowing. Others do edging and trimming every third or fourth time they mow, or whenever it may look necessary to give the lawn and landscape a uniform look.

Edging and Trimming Tips

No matter how often you choose to do edging and trimming, it is important to do it effectively!

  • Use only the proper tools for these landscaping tasks. This will help prevent injuries or strain on your hands, wrists and elbows, and will get the job done more quickly and efficiently.
  • Check edgers and trimmers regularly to be sure they are sharp, well-oiled and in good functioning condition. Keep extra string for a trimmer on hand so you can quickly replace the spool when it runs out.
  • Always practice good safety measures when edging and trimming. Wear safety goggles if there is risk of flying debris (as there often is), and keep the tools away from children and pets.

For many people, edging and trimming is all part of good lawn maintenance. Once you know the differences between them and how to do them well, you’ll be amazed at the difference these tasks make to the beauty of your lawn.