Author Archives: Rachel Patterson

Tent Caterpillars

“Ugly” “disgusting” “gross” and “creepy” are just a few things gardeners say when they see tent caterpillars. Not only are they visually unattractive, but the hundreds of caterpillars within a tent can defoliate a shrub or tree in a matter of days. Fortunately, the attack is seldom fatal.

About Tent Caterpillars

The Eastern tent caterpillar, Malacosoma americanum, one of the 26 species of tent caterpillars or tent worms, emerges from its egg in early spring as the leaves of the host plant, generally a member of the Rosaceae family, begin to open. Along with other emerging caterpillars, it climbs up the plant and begins building a silken nest in branch forks to provide group protection from predators, maintain warmth and act as a staging site prior to leaving the tent. The worms quickly consume any leaves within the nest, forcing them to forage outside of the nest during the day. At night, they return to the protective nest to rest and stay warm. In fall, the individual caterpillars spin cocoons and two weeks later emerge as snout moths. As adults, they mate, lay eggs and die. Thus, the cycle starts again.

Eliminating Tent Caterpillars

These are four methods to deal effectively with tent caterpillars…

  1. Bacillus thuringiensis (Bt) effectively kills this pest when young. Following directions, directly spray onto surrounding leaves and onto the tent. The unsightly nest will remain, but the caterpillars will die. In time, the nest will decay and disappear, or it can be removed manually if desired.
  2. Releasing parasitic wasps and attracting birds to the landscape will also reduce the worm population. This provides a long-term solution and increases the natural biodiversity of the area. Wasps and birds will also help control many other unwanted insects in the region.
  3. Removing the tent removes the eyesore and the worms, if the tent isn’t too large. In the early morning or evening, when the worms have not yet left the tent or have already returned, thrust a stick into the middle of the web and twist until the tent is on the stake and off the tree, and then plunge it into soapy water to kill the worms. Or, remove it by pruning the branches and twigs going into and out of, the tent, but be sure to dispose of it properly so the caterpillars do not move on to another nearby location.
  4. In the fall, after deciduous leaves have fallen, remove any egg masses. Look for them on or near any trees previously infested. They’re usually 6-18″ from the tips of branches.

Our friendly staff is here to answer your questions about these and other pests. We have a wide variety of safe and effective methods to keep your garden beautiful, and are always willing to help you find a solution that meets your needs and preferences.

tent-cat-2

tent-cat-1

The Enabled Gardener

As we age, many activities that have brought us joy are lost as physical limitations set in. Gardening does not have to be one of those lost hobbies. With a little planning, gardening can be made accessible for everyone. No matter what your needs or abilities, there are ways to modify your practices, situations and tools so that you can enjoy the therapeutic benefits of gardening.

  • Beat the Heat
    High temperatures can lead to fatigue, heat stroke and other dangerous conditions, so garden early in the morning or late in the day when temperatures are lower. Drink plenty of water to stay hydrated. Wear lightweight, loose fitting clothes that cover exposed skin. Wear a hat, apply sunscreen, eat light meals and wear gloves.
  • Stay on the Level
    Getting down to the dirt can be difficult if you have joint or mobility problems. Use raised bed systems to reduce the need to bend or kneel. Knee pads are also a good idea, or you can use a lawn chair cushion to make kneeling more comfortable. Garden stools can provide an intermediate step between standard gardening and raised beds.
  • Get a Grip
    Adaptive tools like Radius tools offer better leverage and improved grips help make gardening easier. Look for ergonomic tool designs that can alleviate hand pain and help you leverage your motions more easily for more efficient gardening using less effort or strain.
  • Downsize
    If a large garden is outside your ability or endurance, there are still areas you can indulge your green thumb. Choose container gardening or window box projects for smaller areas that are easier to reach but can be just as productive and fun for creative gardening.
  • Go Vertical
    Don’t overlook the possibility of vertical gardening. Climbing plants reduce the need for bending and stooping and bring the plants into easy reach. Look for fences, walls and other areas you can use for vertical gardening, or create unique vertical container gardens to make the best use of climbing space.
  • Sow the Joy
    If you have trouble managing a garden on your own, sow seeds of gardening joy with others in your life and you’ll have plenty of able helpers. Invite neighbors, friends, children and grandchildren to help out in the garden, or offer to help start a joint garden at a senior center, community center, church or elementary school where many hands can make light work of garden chores.

Even if gardening gets more difficult as you age, you don’t have to give up your passion for playing in the dirt. Adjusting your gardening style is easy and you will continue to enjoy the beauty, bounty and relaxation that gardening brings.

enabledgardener2

Gardener Preparing Raised Beds in Vegetable Garden With Rake

Think Outside the Window Box

Do you want to add more plants to your yard but think you’re out of space for any more gardening? No matter how large or small your outdoor living area, no matter what types of plants you favor, you can always find the space for a new garden when it’s housed in a container – and that container doesn’t have to be the same old window box or boring planter.

Whether you choose to feature your container gardening efforts sitting on the floor, deck, stairs, path or patio, or you prefer a delicate garden suspended in a basket from an arbor, pergola, archway or hook, we’ve got the container selections that will suit your taste and your lifestyle. Not sure what your preferences are? We can help you discover you best container garden design look! Choose from our great selection of…

  • Hanging Baskets – Choose from willow, moss, wire, cocoa, resin wicker weave or rope weave baskets in different sizes, colors and styles. We also carry self-watering hanging planters and pots in several different sizes, colors and designs to suit your needs and style preferences, and to blend well into your other garden décor and accents.
  • Pots – Shop our extensive line of hand-crafted and manufactured pottery from around the world – Italy, Malaysia, China, etc. – with unique and stunning designs and colors. Choose from a selection of clay, plastic, fiberglass, cement, tin or resin pots in various themes as well as designer and lightweight insulating pottery.
  • Planters – Choose from our lined hayracks, cradle planters (also lined), railing, fence and deck planters as well as pot trellises and obelisks to add interesting structure and layers to different containers in your yard. Many different sizes are available to suit all your planting needs.
  • Accessories – To coordinate your décor efforts even among different pots or planters, we have saucers, caddies, plant stands and brackets, hangers, chains and s-hooks for both indoor and outdoor use so your plants are always displayed to their best advantage. Not sure what you need to give your planter the best support? We’ll help you choose the smartest and safest option.

Stop by and take a look for yourself – we’re sure that you will find a container that holds your interest as well as your plants. And, of course, we also carry window boxes in different sizes, styles and designs, if you still prefer that traditional, classic look!

AA014569

thinkoutside3

thinkoutside1

Tropical Outdoor Living Room

This year, discover the pleasure of tropical plants by transforming your courtyard, balcony, flat roof or deck into a wonderland oasis. If you haven’t experienced the hot colors and unusual textures of plants like mandevilla, dipladenia, stephanotis, passion vine, bouganvillea, oleander, hibiscus, lantana and Pandora’s vine, you’re in for a treat!

Growing Tropical Plants

Tropical plants can be grown in pots and planters almost anywhere, providing they get at least 6 hours of sun daily. Fertilize them weekly with Jack’s Classic Blossom Booster and keep the soil evenly moist. Spray every 10-14 days with a light concentration of Bonide All-Season Oil Spray to control insects like mealybugs, aphids and scale. Check for each individual plant’s needs for proper fertilization, space and other care, and you’ll discover that tropical plants are no more difficult to care for than any container garden.

Creating Tropical Arrangements

Tropical plants can pack a punch by themselves, but they look even more lush and paradise-like in thoughtful arrangements. Go for the filler-thriller-spiller formula when planning a tropical container, and choose plants with good contrasting colors and unique foliage to make the most of every combination. To help the plants “pop” in the arrangements, opt for more understated, neutral pot or container colors, and let the vibrancy of the plants shine through.

More Tips for a Tropical Outdoor Living Room

To give your outdoor living space a truly tropical feel…

  • Use wicker, bamboo or similar tropical materials for outdoor furniture, topping chairs and loungers with bold patterns and bright colors for a tropical vibe.
  • Use louvered shutters to enclose a shady spot but still catch breezes, and go for a beachy look with driftwood-esque stains and finishes.
  • Add torches or lanterns for ambient lighting, or add a touch of whimsy with a string of lights with tropical themes, such as palm trees or flip flops.
  • Add cute tropical flair to the yard with a lawn flamingo, seashell fountain, teal gazing ball or similar decorative accents. Pineapple, flamingo, nautical and beach themes are popular.
  • Include a water feature if possible for that splashing wave sound. A tabletop fountain or even a sound machine can create a similar tropical ambiance to enjoy.
  • Serve up the tropics with beachy beverages, fresh fruit and themed appetizers whenever you entertain in your tropical outdoor living space.

No matter where your garden may be, you can add a touch of the tropics when you plan a fun and inviting tropical outdoor living room.

tropicaloutdoor1

tropicaloutdoor2

Vegetable Gardening Tidbits

Are you ready to make the most of your vegetable garden? Try these tips and tidbits for everything from easier weeding to stopping pests to enjoying a hearty harvest!

  • Reducing Weeds
    Minimize weeds in your garden by covering the soil between planting rows with mulch. Several sheets of moistened newspaper topped with hay or straw works very well, especially if you move your planting areas around a bit from year to year. You can even use carpet scraps placed upside-down. Landscape fabric topped with wood chips or gravel is a good choice if the walkways are permanent. Try to avoid the habit of tilling to remove weeds because this process brings up weed seeds from deeper in the soil and exposes them to the light they need to grow.
  • Increase Tomato and Pepper Production
    Fruiting of your tomatoes and peppers may be improved by applying Epsom salts, which contain sulfur and magnesium. Apply one tablespoon of granules around each transplant, or spray a solution of one tablespoon Epsom salts per gallon of water at transplanting, first flowering and fruit set. You can find Epsom salts at drug and grocery stores.
  • Supporting Tomato Plants
    Set your tomato supports in place before plants get too large. Smaller determinate (bushy) varieties can be supported with small cages, but larger indeterminate (vining) varieties need large cages or tall stakes. Secure cages with stakes so they don’t fall over as plants grow larger and heavier.
  • Growing Larger Tomatoes
    Indeterminate tomato plants, such as ‘Better Boy’, will produce many suckers. A sucker is a new shoot that starts where a branch connects with the main trunk. Removing suckers will decrease the number of fruits produced, but the remaining tomatoes will be larger and will ripen sooner.
  • Ending Blossom End Rot
    To minimize blossom end rot, keep soil evenly moist, apply a layer of mulch to conserve moisture, don’t over-fertilize (especially avoid high-nitrogen fertilizer) and avoid damaging plant roots while cultivating. Blossom end rot shows up as dark sunken spots on the blossom or non-stem end of tomatoes, peppers and squash. It’s caused by a calcium imbalance in the plant. The soil may have adequate calcium, but the plant isn’t able to take up enough to supply the rapidly developing fruit.
  • Stop Slugs and Snails
    Slugs and snails may be deterred with coffee grounds, diatomaceous earth and even sharp gravel. Spread any of these materials in a ring around individual plants. Wrap pots with copper tape to keep slugs from crawling up. Inspect foliage and pick off any insects that have already passed the barriers.
  • Keep Cucumber Beetles at Bay
    Young cucumber, melon and squash plants are easy prey for cucumber beetles. As the seedlings grow, these yellow-striped or spotted beetles emerge to feed on their foliage. The beetles also spread bacterial wilt disease. To control cucumber beetles use a portable vacuum cleaner to suck up them up in early evening, spray beneficial nematodes on the soil or try planting broccoli, calendula, catnip, nasturtium, radish, rue or tansy, which naturally repel these insects. If you want to try marigolds to repel them use the more pungent varieties like African, French or Mexican marigolds. The more common marigolds may actually attract these pests.
  • Plan for Late Summer Harvests
    It’s not too late to sow lettuce, beets, carrots, radishes and other short-season crops for a late summer harvest. Shade lettuce, if possible, during late afternoon to keep young plants cooler, or grow them next to larger plants that provide some shade. You’ll need to water more often on these hot days than you did in spring and early summer, but you can easily extend their growing season for later harvesting.
  • Grow More Tomatoes, Zucchini and Beans
    Harvest tomatoes, zucchini, beans and other fruiting crops frequently to encourage continued production. Don’t allow any fruits that you won’t be harvesting to remain on your plants, because when mature seeds are produced it’s a signal for the plant to slow down fruit production. Instead, consider sharing, selling, preserving or trading extra produce so you can continue to harvest and extend the growing season.
  • When to Harvest Herbs
    Herbs are best harvested just as they are beginning to flower. That’s when they have the highest concentration of essential oils and flavor in their leaves. Harvest entire branches back to within a few inches of the main stem to encourage new, bushy growth.
  • Harvesting and Storing Onions
    Begin harvesting onions when about half to three-quarters of the leaves have died back. Then gently dig or pull the onions and store them in a dry, shady place with good ventilation, such as an outdoor shed or barn, for 10-14 days. After the onions have cured, put them in slatted crates or mesh bags and store them indoors in an area with low humidity and temperatures between 33-45 degrees F.
  • Enjoying Green Tomatoes
    When daytime temperatures no longer rise above 65 degrees F in late summer and early fall, it’s time to pick the green tomatoes. Wrap them individually in newspaper and let them ripen indoors, or try some fried or in other recipes that call for under-ripe tomatoes.
Tomato plant and garden tools

veggietidbits3

Gardening

veggietidbits1

Wise Watering

Periods of drought, heat waves and rising water bills can make any gardener more interested in saving water. Fortunately, there are many ways you can be water-wise without skimping on the moisture your plants need to thrive.

  • Make the Most of Mulch
    Mulches not only make plantings look more attractive, but their most important function is to help retain soil moisture. They keep the ground cool to reduce moisture loss and prevent growth of grasses and weeds that would otherwise compete with plant roots for soil moisture. The recommended depth is 2-4 inches, and there are many mulch types you can choose from to complement your landscaping and garden design.
  • Improve the Soil
    Prevent soil compaction and aerate regularly to improve the efficiency of how the soil absorbs and retains water. Test the pH and make sure the levels are correct for the plants you are growing. Till in several inches of compost each year and amend with Profile soil conditioner.
  • Plant Wisely
    When deciding what to plant, consider native species as they are adapted to the area and can withstand the local moisture conditions, including periods of low rainfall or drought. Also consider plants that have been specifically bred as drought-tolerant, particularly for more at-risk areas of your yard. Ask one of our staff for recommendations of native plants.
  • Design Thoughtfully to Save Water
    A good landscape design can help minimize water use. Start with graph paper and sketch your home, property lines, water faucets, existing trees and other permanent features. Plant large deciduous trees to maximize summer shade on the hot sides of your house. Combine groundcover in your plantings. This can reduce surface temperature up to 20 degrees. Plant a dense windbreak to cut down on drying winds. Group plants together by water needs and concentrate high water demand plants into one area. Plant rock gardens, native shrubs or drought-tolerant wildflowers on southern exposures.
  • Use Water-Saving Watering Techniques
    Install a drip irrigation system and use other water-saving devices like soaker hoses to minimize water loss. The system of “drip watering” that was originally designed for commercial use is now available to the home gardener. It has become very easy to use and quite effective. Drip watering applies water slowly and steadily directly to root zones in proper amounts. This saves time (less time watering and weeding) and money (less water). It also puts water where it’s needed without runoff or evaporation.
  • Choose the Proper Watering Tools
    You will want to look at our various styles of oscillating and pulsating sprinklers and choose the sizes and styles that meet your unique landscaping needs. Other assorted nozzles and wands can also make watering easier and more efficient. The Four Channel Water Distributor allows several watering accessories to be used at the same time.

It doesn’t take much to get started watering wisely, and not only will your plants thank you for providing adequate moisture, but you’ll love how much your water bill dries up!

wisewatering2
wisewatering1
wisewatering3

Dealing with Powdery Mildew

One of the most common and easy to recognize plant diseases, powdery mildew, is caused by fungus spores that overwinter in garden debris and are spread by wind the following season. In late spring and early summer, the warmer days and high humidity provide perfect conditions for spore germination. The disease spreads over the surface of leaves of plants like Bee Balm, Lilac, Rose and Phlox. While the plant may look extremely unattractive, its overall health is not affected. Although we can’t change the conditions that favor powdery mildew, we can stop or slow its spread to keep your plants looking their best.

To control powdery mildew…

  • Place susceptible plants in locations where they receive early morning sun. This allows the dew to dry quickly from their leaves to inhibit the spread of mildew spores.
  • Increase the plants’ resistance by minimizing stress and providing adequate water, sun and soil requirements. This will help the plants naturally resist powdery mildew and other common diseases.
  • Give plants plenty of room for good air circulation. This helps leaves dry more quickly and lowers humidity so conditions are not as favorable for the mildew spores.
  • Water the soil not the leaves of susceptible plants. Use soaker hoses, drip systems or watering wands to get water just to the base of the plant and out to the drip line without watering the foliage.
  • Select mildew-resistant varieties of plants. These will vary in different areas and depend on your soil conditions and landscaping needs.
  • Prevent the disease from effecting susceptible plants by spraying with a fungicide like Bonide Fung-onyl, Bonide Infuse Systemic Disease Control or Safer Garden Fungicide every 7-14 days while conditions are favorable. Always read fungicide labels completely before applying and follow instructions carefully to prevent mishaps that could damage your plants.
  • Eliminate the breeding grounds for powdery mildew by cleaning up the garden and yard each fall, removing leaf litter, pruning branches and replacing old mulch. This will minimize the areas where spores can overwinter, reducing the chances of more mildew spreading in the spring.

Powdery mildew may not be pretty, but it can be pretty easy to control if the right steps are taken to protect your plants. Using multiple techniques will be the most effective way to reduce the spread of the mildew and keep it under control or completely eliminated so your plants always look their best.

Powdery Mildew Disease on Leaves

Winter Vegetables on the Table

Winter marks a seasonal change. Our bodies seem to crave deeper, more tantalizing, richer tastes rather than light, bright, fruity flavors of summer. Harvesting vegetables in the late fall, and sometimes into the winter, presents us with bounty for slow, simple and savory cooking. All winter vegetables may be boiled, roasted, grilled, stewed, sautéed, steamed or eaten raw.

Which Vegetables Are Winter Vegetables?

Winter vegetables are generally considered those that are either harvested late in the season or have the capability of being kept for several weeks or months without losing their flavor, texture and nutritional value. Which of these will grace your table?

The cole, or cruciferous, vegetables such as broccoli, Brussels sprouts, cabbage, cauliflower, turnips and kohlrabi rank highly for many nutrients including vitamin C, soluble fiber and other nutrients with anticancer properties. Interestingly, boiling seems to reduce the potency of these nutrients, but other cooking methods don’t.

Root crops, including beets and carrots, sustain life around the world. Beets provide folate, nitrates and manganese in dishes such as borscht and pickled beets. Carrots contain diverse vitamins including A, C, K and B6 and antioxidants from carotenoids. Interestingly, recent research suggests many people prefer the flavor of steamed carrots to boiled.

Fennel, with its anise flavor, jazzes up meals throughout the world but is a favorite in Mediterranean and Italian cuisine. It tops nutritional lists with its antioxidant benefits. Try some raw in salads and appetizers.

Celery, related to fennel, adds a distinctive crunch when used in salads as a raw ingredient or a stronger flavor to soups and stews. With a mild taste, celery is versatile in a wide range of dishes, including mashes, stuffings and roasts.

Potatoes and sweet potatoes, long associated with the typical American holiday meal, contain many healthful benefits. According to research, boiling or steaming sweet potato provides the most health benefits; the phytochemicals in them rival that of broccoli. Roasting or baking potatoes is a healthy way to enjoy them, provided you are sparing with the toppings.

Winter squashes, from acorn to pumpkins, also serve as healthy sources of carbohydrates. Because 90 percent of the calories are starch-related, people are surprised at recent studies proving the antioxidant, anti-inflammatory and insulin-regulating effects of winter squash. Additionally, the roasted seeds make a delicious and healthful snack.

Winter Vegetable Recipes to Savor

Have you ever wondered how to roast vegetables? It’s easy! Just wash the vegetables, cut into 1″x1″ cubes, and place in mixing bowl. Drizzle over a few tablespoons extra virgin olive oil and mix to cover all pieces. Place as a single layer in a cookie or roasting pan. Sprinkle with salt and pepper and cook at 375⁰ Fahrenheit for approximately 45 minutes or until the desired texture is reached. Jazz it up with cinnamon, garlic, curry, rosemary or any other favorite spice or seasoning mix.

Here are some other recipes to bring these wonderful winter vegetables to your table. Bon appétit!

Roasted Winter Squash Seed and Cheese Ball Appetizer

Step 1: Roast winter squash seeds by cutting the winter squash in half and removing the seeds and stringy “gunk.” Put into a bowl half filled with water and rub between your hands to separate the seeds from the strings. Rinse the seeds again and spread out on a cookie sheet. Use a hair dryer or place in 150⁰ Fahrenheit oven to dry. Stirring every 10 minutes reduces drying time and ensures even drying.

Step 2: When dry, place seeds in bowl and combine with choice of seasonings. Mix thoroughly. Return to cookie sheet. Place in 275⁰ Fahrenheit oven for 10-20 minutes. Watch closely to prevent burning. When cool, chop finely to coat cheese ball.

Seasoning ideas

  1. Latino: 4 Tbs. melted butter, 2 tsp. chili powder, 1 tsp. oregano
  2. Asian: 4 Tbs. melted butter, 2 tsp. ground ginger, 1 tsp. hot mustard, 1 tsp. honey
  3. Holiday: 4 Tbs. melted butter, 2 tsp. cinnamon, 1 tsp. nutmeg, 2 tsp. sugar
  4. Use your imagination!

Step 3: Make cheese ball.

Ingredients:

2 pkg. (8 oz. each) softened Neufchatel cheese

1/2 cup shredded sharp cheddar cheese (Low fat)

Directions:

Beat Neufchatel and cheddar in small bowl with mixer until well blended. Refrigerate 1 hour. Shape into ball. Press seasoned winter squash seeds onto cheese ball.

Serve with complimentary crackers, tortilla chips, pretzels or flatbread.

Winter Squash Casserole

(serves 2)

Ingredients:

2 Cups winter squash, peeled and cut into 1-inch cubes

3 Tbs. extra virgin olive or macadamia nut oil

1 tsp. orange juice

1 tsp. lemon juice

Directions:

Steam squash chunks, covered, for 7-8 minutes, until just tender

Mix remaining ingredients, pour over squash in bowl

Toss while still warm. Serve.

Other Ideas:

  • Cook 1/2 C chopped onion with squash, or
  • Add fresh herbs such as basil or rosemary to liquid dressing, or
  • Sweeten with 1 tsp. cinnamon and 2 tsp. honey, or
  • For Asian flavoring, add 1 Tbs. minced fresh ginger, 2 tsp. soy sauce

Super Easy Grilled (or Baked) Cauliflower

  1. Remove the leaves. Cut the head in two, core the stem. Place both on large piece of heavy-duty foil.
  2. Melt 1/2 Cup butter with 2 tsp. garlic salt and 2 tsp. lemon pepper.
  3. Drizzle half of butter mixture over each half and sprinkle each with 3 Tbs. parmesan cheese
  4. Rejoin the two halves and drizzle remaining butter mixture on the outside.
  5. Fold foil around, creating a ball.

Cook at 350⁰ Fahrenheit for approximately an hour or until soft. Delicious!

Pruning Red Raspberries

There’s an unfounded rumor that raspberries are difficult to prune. This isn’t true if you understand the type of raspberry in your garden. Summer-bearing raspberries produce only one harvest per year while everbearing, or fall-bearing, raspberries can produce two harvests.

Raspberry Types

Summer-bearing raspberries plants bear fruit on one type of cane, a floricane. These large, thick canes grow fruiting lateral branches. Most of the purple and black raspberry varieties and some red varieties are summer-bearing plants.

Everbearing raspberries grow two types of fruiting canes, floricanes and primocanes. The floricanes are similar those of the summer-bearing raspberry. However, the primocane has no lateral branches. Instead, the fruit buds are located on the thick cane. Most red and yellow raspberry varieties are everbearing.

No matter what type of raspberry you grow, proper pruning improves production and the taste of the fruit, the appearance of your garden and makes it easier to harvest the delicious fruit.

Raspberry Pruning Tips

If you are growing summer-bearing raspberries, you will follow a cycle of pruning out the older floricanes, which already bore fruit. If you are growing ever-bearing raspberries, you will prune out floricanes and the top one-third of the primocanes where fruit developed in the fall. However, you can choose a second option for pruning everbearing raspberries. Simply cut the entire plant to the ground in early spring to produce berries from fall until the first frost. This sacrifices the summer harvest, but puts all plant energy into fruit production for fall harvest, creating a larger, more robust crop. It also protects the canes from any extreme winter conditions and reduces insect damage. Using row covers or greenhouses to maintain a warmer temperature easily extends the harvest season later into the fall.

To simplify the pruning process…

raspberry-chart

When you grow your own berries, you know exactly how they were grown, you save money, and best of all, they taste great, even with dirt under your fingernails!

raspberry-1

Versatile Hydrangeas

Tall or short, red, pink, purple, blue, white and shades in between, few shrubs provide the versatility of hydrangeas. Generations of gardeners have loved and designed their gardens using these showy shrubs as summer privacy screens, landscape focal points and beautiful cut flowers. Now, thanks to new hydrangea introductions, there are even more ways to use them.

Discover the Newest Hydrangeas

New types of hydrangeas are being introduced every year, and these showstoppers are fast favorites among both experienced hydrangea aficionados as well as newcomers to the hydrangea craze.

  • ‘Endless Summer’
    Termed “the best new flowering shrub of the decade” by some gardeners, this cultivar has gained a reputation as the first “reblooming” hydrangea. Blooming from early summer to first frost on both new and old wood, it is unfazed by high heat or extreme cold. Now gardeners in colder microclimates can grow beautiful low maintenance 3-5’ tall and wide hydrangeas. The 8″ diameter mophead balls of light blue or pink flowers bloom the entire summer.
  • ‘Bloomstruck’
    A dwarf ‘Endless Summer’ this hydrangea grows to only 2-4’ tall and wide with pink or blue 4-5″ diameter mopheads on upright red-purple stems. Perfect for containers, in smaller gardens or in the front of cutting beds, it also graces balconies and decks. In fall, red-purple colored leaves extend the beauty.

Color Tip: Change the flower colors of ‘Endless Summer’ and ‘Bloomstruck.’ The soil pH affects the flower color of many hydrangeas. To intensify the pink color, decrease the acidity by adding hydrated lime. To intensify the blue color, increase the acidity by adding sulfur. Our staff can suggest products to help you determine your soil pH and the amount of lime or sulfur to use.

  • ‘Quickfire’
    Also known as Hydrangea paniculata, this variety blooms earlier than most other hydrangeas and has flowers along an elongated stalk. The flowers, blooming on new wood, open as white, gradually turning to pink in the summer and darker rose in the fall. The soil pH does not affect the flower color. As one of the hardiest hydrangeas, this beauty grows to 6′ tall in most soils, full sun or dappled shade and tolerates drought conditions.
  • ‘Little Quickfire’
    A dwarf form of ‘Quickfire,’ this tiny powerhouse has all the beauty and benefits of its bigger relative but in a small package. Growing only to 3-4′ tall with a slightly larger spread, this hydrangea makes a big statement in a little space when covered with blooms and can be an ideal choice to start out with hydrangeas.
  • ‘Bobo’
    Another paniculata hydrangea, this variety creates huge drama for such a little plant. Growing only to 3′ tall and wide, it’s a thriller in containers, and easily won the Gold Florall medal for best novelty plant. ‘Bobo’s early season white flowers also bloom on new wood and cover the plant on strong overhead stems. Unaffected by soil type or pH, this hardy hydrangea steals the show wherever it is planted.

No matter how you use these newcomers in your landscape – larger varieties in the back of beds or as borders, smaller options in the front or in containers – their long-lasting flowers will make you think summer truly is endless.

hydrangeas-4

hydrangeas-1

hydrangeas-2

hydrangeas-3

A Taste of the Tropics

It only takes a few plants to cast a tropical look upon a garden. Although our gardening zone here isn’t strictly tropical, it’s still possible to include some tropical and tropical-looking plants in our landscapes to create a lush summer oasis that hints at a vibrant paradise.

Use Houseplants for Tropical Flair

A simple way to add a tropical touch to your garden is to place houseplants among your outside ornamentals. As many of our houseplants originated in tropical, semi-tropical or desert zones, they’re right at home in the summer garden. Consider the effect of adding spathiphyllums, orchids, ficus or cacti to your garden or patio. A brugmansia (sometimes called datura), with giant drooping, fragrant flowers epitomizes the idea of “tropical.” Potted citrus trees produce fruit and fragrance. A “tree” of tillandsias (air plants) creates an amazing sculpture. A single large stag-horn fern hanging from the side of a sturdy shade tree is another eye-catcher. When summer ends, simply shower the plants, look for insects and treat if necessary, and reinstall them in the house to provide winter enjoyment.

Summer Tropical Bulbs

Many beautiful bulbs can add a tropical vibe to your garden with very little care or maintenance. Here are a few of our favorite summer bulb additions to the tropical garden, but remember that these plants are not winter hardy here and the bulbs must be dug up and stored inside for the winter.

  • Caladiums: Available in a variety of colors including pink, white, gray, green, red, white, mottled and variegated. These plants flourish in shade with rich soil and regular watering.
  • Callas: This slender plant with large green leaves grows 2-4′ tall. White spath-shaped flowers in spring and early summer rise above the leaves. Grows best in wet soils and light shade.
  • Cannas: Large leaves of green, red or variegated with spectacular flowers of red, orange, yellow, pink or cream in summer and early fall. Tall varieties grow to 6′ and dwarf varieties grow to 3′. Plant in full sun.

In addition to bulbs, other bold and exciting additions with tropical flair include:

  • Chilean Jasmine (Mandevilla laxa): A deciduous vine growing 15′ or higher, this provides an overhead tropical look when grown on a pergola or overhead structure. Very fragrant white flowers in summer add to the tropical effect. Requires rich soil.
  • Gunnera: Huge, dark green, stiff-haired leaves growing to 8′ tall. These “dinosaur food plants” make an amazing statement in the landscape. Requires good soil and ample water. Produces large red cone-shaped flowers.
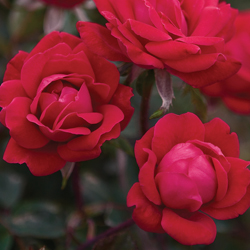
  • Hibiscus: Tropical Hibiscus may be set outside for the summer in our area and brought back in when the cold weather sets in. There are, however, two varieties of hibiscus that are hardy in our area:
    • Rose-Mallow or Perennial Hibiscus (Hibiscus moscheutos): An American native, grows as a perennial with many varieties of different sizes and colors. Flowers may grow to 12″ diameter in red, pink or white. Regular fertilizing increases bloom vigor and colors.
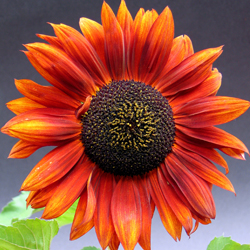
    • Rose of Sharon (Hibiscus syriacus): Deciduous shrub growing to 12′ tall but easily trained or kept smaller. Flowers, 2.5-3″, in mid- or late summer.
  • Palms: Nothing says tropical like a palm. Here are four that are readily available and can be used in your garden for a lush accent.
    • Needle Palm (Rhapidophyllum hystrix): Fan palm with short or no trunk, to 6′ tall. Extremely winter hardy.
    • Dwarf Palmetto (Sabal minor): Native to the southeastern United States. Grows 4-6′ tall by 8′ wide. Green or blue-green fan-shaped fronds.
    • Mazari Palm (Nannorrhops ritchiana): Shrubby clumping growth to 6′ tall, bluish-green colored fan fronds.
    • Windmill Palm (Trachycarpus fortunea): Grows to 30′ tall and 10′ wide.
  • Bamboo: Few plants rival this group of grasses for hardiness, tropical appearance and variation. Both clumping and running bamboos vary in color, height and requirements. From the dwarf to the giant, there’s a bamboo to add tropical pizzazz to your garden.

To see the best selections for our growing zone or ask questions about creating a tropical garden, come in and talk with our friendly staff. They can help you make the best selection to put the topical in your garden paradise.

tropics-5tropics-1

tropics-2

tropics-3

tropics-4

Goji Berry (Wolfberry)

Touted by some as the “fruit from the fountain of youth” because of its high antioxidant, carotene and essential amino acids content, the goji berry (Lycium barbarum), also creates a large sensation in the garden. Additionally, it’s easy to grow in zones 3-10 (even in seaside locations!) and doesn’t need a second plant for cross-pollination as it is self-pollinating. Is this super plant right for your garden?

Growing Goji Berry

In its natural form, this vigorous vine sprawls along the ground but training it to grow vertically is tidier, more space efficient and will protect nearby plants from overcrowding. Tie it to a strong stake, espalier along a wall or train along another framework for an attractive 8-10′ long plant and easier harvesting of the berries. Full sun exposure produces the most fruit. In areas where summer temperatures exceed 100⁰ F, provide afternoon light shade. It thrives in alkaline soil with a pH from 6.8-8.1. Add lime to the soil to increase the pH, if necessary. Regular watering and light fertilizing, along with light pruning to maintain its shape and appearance, are all that’s necessary to grow your own goji berries.

If your space is limited, grow goji in a container. Container growing produces fruit earlier, makes it easier to maintain the soil pH and easily manages the vine’s size. Moreover, it’s quite attractive. Because the taproot grows deeply, be sure to choose a frost-proof container at least 18″ deep and 18″ diameter or larger.

In the spring, bright red-orange berries follow lavender bell-shaped flowers. Since birds love the fruit, cover with netting to protect it so it can ripen fully.

The berries turn red before they reach their full ripeness. Allow the berries to remain on the plant prior to harvesting to develop the best flavor. The best way to tell if they’re ripe is to eat one. When the tart taste becomes sweeter, they’re ready. Use the fresh berries in salads, sauces, juices or soups, or experiment by adding them to favorite jam recipes, infusing water or creating crushed fruit spreads. Alternatively, preserve your berries by drying or freezing and you can enjoy them long after the harvest ends.

At first frost, the plant becomes dormant and the leaves drop. They’re hardy to -18⁰ F. When the temperatures rise to 50⁰ F, the leaves and fruit begin anew. In warmer areas, then, the growing season will be longer and you can enjoy goji berries even more, while in cooler zones you will have a shorter season, but one that is just as sweet.

If you have questions or need assistance choosing your goji berry, soil or container, our friendly staff is always glad to help.

gogi-1